Tips to Do a Maternity Photoshoot by Yourself
Maternity photoshoots are a beautiful way to capture the precious moments of your pregnancy journey. While hiring a professional photographer is an option, doing a maternity photoshoot by yourself can be a rewarding and personal experience. Not only does it give you control over the creative process, but it also allows you to create intimate and unique memories at your own pace. Here’s a comprehensive guide with tips to help you conduct a successful DIY maternity photoshoot.
1. Planning Your Photoshoot
Before you start taking pictures, spend some time planning your photoshoot. This involves deciding on the theme, location, timing, outfits, and props. Planning ahead ensures that you have all the necessary elements in place to capture the perfect shots.
- Choose a Theme: The theme sets the tone for your photoshoot. Whether you prefer a natural, outdoor setting, a cozy indoor shoot, or something more artistic, having a theme will guide your choices for outfits, props, and location. Some popular themes include nature-inspired, bohemian, vintage, or minimalist styles.
- Select a Location: The location you choose should complement your theme. Consider shooting in a place that holds special meaning to you, such as your home, a nearby park, or a favorite spot in nature. If you’re shooting indoors, make sure the space has ample natural light and is free of clutter.
- Time It Right: The timing of your photoshoot is crucial for capturing beautiful light. The best times for outdoor photography are during the golden hour—shortly after sunrise or before sunset—when the light is soft and warm. If you’re shooting indoors, try to schedule your session when natural light is abundant.
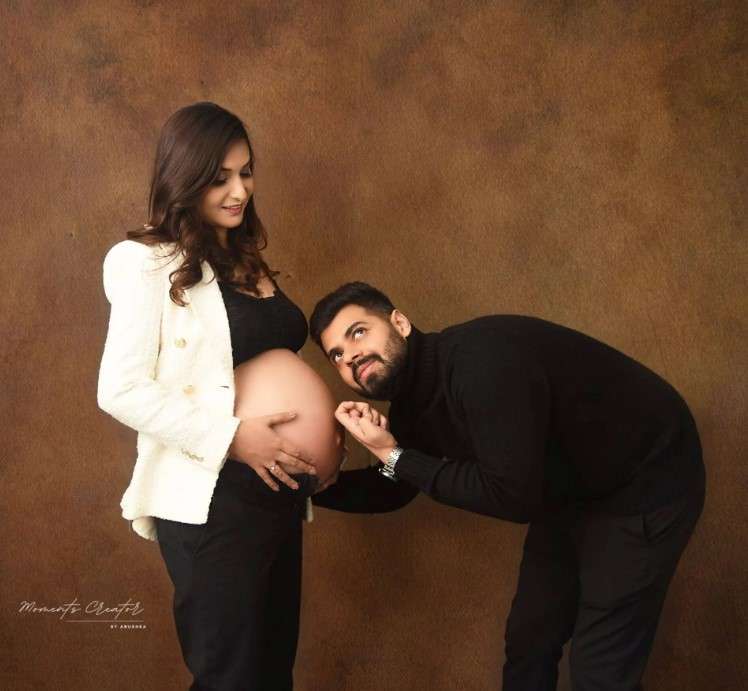
- Outfit Selection: Your outfit should reflect your personal style while complementing the theme of your photoshoot. Choose clothing that is comfortable and highlights your baby bump. Flowy dresses, fitted tops, and maternity gowns are popular choices. Solid colors and simple patterns work well, as they don’t distract from the main focus—you and your baby bump.
- Gather Props: Props can add a personal touch to your photos. Some ideas include baby shoes, ultrasound pictures, a chalkboard with your baby’s due date, or items that reflect your hobbies and interests. However, avoid using too many props, as they can take the attention away from you.
2. Setting Up Your Camera and Equipment
Having the right equipment and knowing how to use it is key to taking great photos.
- Camera Options: You don’t need a professional camera to take beautiful maternity photos. Many smartphones have excellent cameras with features that allow you to capture high-quality images. If you have access to a DSLR or mirrorless camera, even better! The most important thing is to be familiar with your camera’s settings and capabilities.
- Tripod: A tripod is an essential tool for a DIY photoshoot. It allows you to stabilize your camera and compose shots without needing someone to hold the camera for you. A tripod with an adjustable height is ideal for capturing different angles.
- Remote Shutter or Timer: To avoid running back and forth to press the shutter button, use a remote shutter release or the self-timer function on your camera. Most smartphones have a timer option that you can set for a few seconds delay, giving you enough time to get into position.
- Lighting: Good lighting is crucial for any photoshoot. If you’re shooting indoors, position yourself near a window to take advantage of natural light. Avoid using harsh overhead lights, as they can cast unflattering shadows. For outdoor shoots, aim to take photos during the golden hour to achieve a soft, glowing effect.
3. Composing Your Shots
Composition is the art of arranging elements in your frame to create visually appealing images. Pay attention to the following aspects when composing your shots:
- Rule of Thirds: The rule of thirds is a basic photography principle that helps you create balanced and interesting compositions. Imagine your frame is divided into nine equal parts by two horizontal and two vertical lines. Position your main subject (your baby bump) along these lines or at their intersections to create a well-balanced image.
- Angles and Perspectives: Experiment with different angles and perspectives to add variety to your photos. For example, try shooting from above to capture the curve of your belly or from the side to highlight your profile. You can also take close-up shots of your hands on your belly or wide shots that include the entire scene.
- Background and Foreground: Be mindful of what’s in the background and foreground of your shots. A cluttered background can distract from the main subject, so choose a clean and simple setting. If you’re shooting outdoors, use natural elements like trees, flowers, or a beautiful landscape to complement your composition.
- Framing: Use natural frames, such as doorways, windows, or arches, to add depth and interest to your photos. Framing helps draw attention to the subject and creates a sense of focus within the image.
4. Posing Ideas
Posing can make a significant difference in the overall look and feel of your photos. Here are some posing ideas to try:
- The Classic Belly Hold: One of the most popular maternity poses is holding your belly with both hands. This pose emphasizes your baby bump and creates a sense of connection between you and your baby.
- Side Profile: A side profile shot is great for showcasing the full curve of your belly. Stand or sit at an angle to the camera, gently cradling your bump with one or both hands.
- Looking Down: Capture a tender moment by looking down at your belly, as if you’re gazing lovingly at your baby. This pose conveys a sense of intimacy and anticipation.
- Silhouette Shot: For a dramatic effect, try a silhouette shot. Position yourself against a light source, such as a window or the setting sun, and capture your outline in a side profile. This type of shot works particularly well during the golden hour.
- Use Props Creatively: Incorporate props into your poses in a natural and creative way. For example, hold a pair of baby shoes in front of your belly, or place an ultrasound photo on your bump.
5. Editing Your Photos
Once you’ve completed your photoshoot, the next step is editing your images. Editing can enhance the overall look of your photos by adjusting lighting, color, and contrast.
- Basic Edits: Start with basic edits like cropping, adjusting exposure, contrast, and brightness. If you’re using a smartphone, there are plenty of user-friendly apps like VSCO, Snapseed, or Adobe Lightroom Mobile that allow you to make these adjustments easily.
- Filters and Presets: Applying filters or presets can give your photos a cohesive and professional look. Choose filters that complement the mood and style of your photoshoot. Be careful not to overdo it, though—subtlety is key to maintaining a natural appearance.
- Retouching: If needed, you can use retouching tools to smooth out any imperfections, such as blemishes or stray hairs. However, avoid excessive retouching, as it can make your photos look unnatural.
6. Capturing the Moment
Finally, remember that the most important aspect of a maternity photoshoot is to capture the emotion and connection between you and your baby. Don’t be afraid to show your personality, smile, and enjoy the moment. These photos will be cherished memories that you and your family will look back on for years to come.
Conclusion
A DIY maternity photoshoot is a wonderful way to celebrate your pregnancy journey and create lasting memories. With a bit of planning, the right equipment, and creative composition, you can capture beautiful and meaningful photos that reflect this special time in your life.