How Can I Repair a Dryer Lint Trap That Won’t Stay in Place?
If your dryer lint trap isn’t staying in place, it can be more than just a minor inconvenience. The lint trap is crucial for keeping your dryer running efficiently and safely. Problems with it can affect your dryer’s performance and even pose a fire hazard. If you need professional assistance, consider an Appliance Part Replacement Service to address the issue. Meanwhile, here’s a guide to help you troubleshoot and repair a lint trap that won’t stay put.
Common Causes of a Lint Trap That Won’t Stay in Place
1. Worn or Damaged Lint Trap
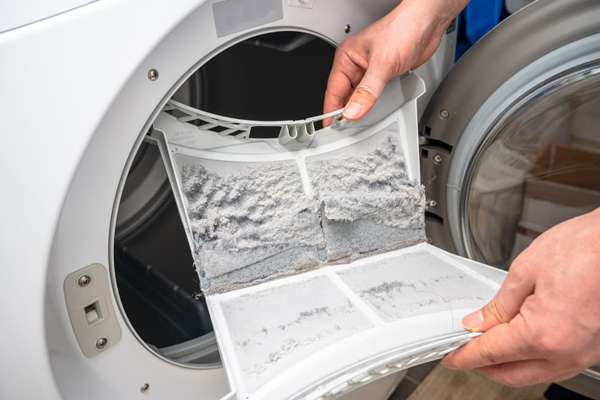
Over time, the lint trap can wear out or become damaged, affecting its ability to stay securely in place.
- Inspect for Wear: Check the lint trap for signs of wear and tear. Look for any cracks or broken parts that might prevent it from fitting properly.
- Replace if Needed: If the lint trap is visibly damaged, replacing it with a new one is often the best solution.
2. Obstructions in the Slot
Debris or lint buildup in the slot where the lint trap fits can interfere with its proper placement.
- Clean the Slot: Use a vacuum or a small brush to remove lint and debris from the slot. Ensure the area is clean and free of obstructions.
- Check for Foreign Objects: Make sure there are no small objects or lint clogs that could be blocking the lint trap’s proper fit.
3. Misaligned Lint Trap
Sometimes the lint trap may not align correctly with its slot, making it difficult to stay in place.
- Check Alignment: Make sure the lint trap is being inserted correctly and aligned with the slot. It should fit snugly without forcing it.
- Adjust if Necessary: If the lint trap seems to be misaligned, gently adjust it to ensure it fits correctly.
4. Faulty Lint Trap Door
The door or latch mechanism that holds the lint trap in place may be faulty or malfunctioning.
- Inspect the Door Mechanism: Examine the door or latch mechanism for any signs of damage or malfunction. Ensure that it closes properly and holds the lint trap securely.
- Repair or Replace the Door: If the door mechanism is not functioning properly, it might need repair or replacement. Consult your dryer’s manual for specific instructions or seek professional help if needed.
Steps to Repair a Dryer Lint Trap That Won’t Stay in Place
1. Unplug the Dryer
Safety is crucial when performing any repair. Always unplug the dryer before attempting to fix or inspect any parts.
2. Remove the Lint Trap
Carefully remove the lint trap from its slot. Check it for any visible signs of damage or obstruction.
3. Clean the Area
- Vacuum the Slot: Use a vacuum to remove any lint or debris from the slot where the lint trap fits.
- Clean the Lint Trap: Wash the lint trap with warm, soapy water to remove any residual lint and debris. Dry it thoroughly before reinstallation.
4. Inspect and Repair Components
- Check the Lint Trap: Look for cracks or other damage. If it’s in poor condition, replace it with a new one.
- Examine the Slot: Ensure there are no obstructions or debris in the slot. Clear out any blockages and clean the area thoroughly.
- Inspect the Door Mechanism: Check for any damage to the door or latch mechanism. Repair or replace any faulty parts as needed.
5. Reinstall the Lint Trap
Once the area is clean and any damaged parts are replaced:
- Align and Insert: Align the lint trap with the slot and gently insert it, ensuring it fits securely.
- Test the Fit: Close the dryer door and check if the lint trap stays in place. It should fit snugly without wobbling or coming loose.
6. Plug the Dryer Back In
After you’ve completed the repair, plug the dryer back in and run a test cycle to ensure everything is working correctly.
Tips for Preventing Future Issues
To avoid similar problems in the future, follow these tips:
- Regular Cleaning: Clean the lint trap after every use to prevent excessive lint buildup. Also, regularly clean the slot and surrounding area.
- Proper Maintenance: Schedule regular maintenance for your dryer to ensure all components, including the lint trap and door mechanism, are in good condition.
- Use the Right Lint Trap: Ensure you’re using the correct lint trap for your dryer model. Using the wrong one can affect its fit and functionality.
Conclusion
A lint trap that won’t stay in place can lead to inefficiency and potential safety hazards. By understanding the common causes and following the steps to repair it, you can address the issue effectively. Regular maintenance and proper cleaning can help prevent future problems. If you encounter persistent issues or need assistance, consider reaching out to an Appliance Part Replacement Service for professional help. Keeping your dryer in good working condition ensures both its efficiency and your safety.